 We are at that stage of toddlerhood where her main goal in life is to put an object in something, move that thing somewhere else, take it out again, and repeat this process basically forever! She loves the little wooden shopping cart we got for her to put things in, but it has fixed wheels that are large and the cart is a bit heavy, so it’s harder for her to turn and maneuver than I would like. Since her other great love right now are all her “babies,” (her little stuffed Lovie animals she sleeps with) I thought a lighter DIY baby doll stroller would be a lot of fun to push them around in and adding caster wheels would also make it easier for her to maneuver. It might look complicated, but it’s a lot easier than you would think since I did all the hard parts of figuring out the dimensions for you—haha, you’re welcome!
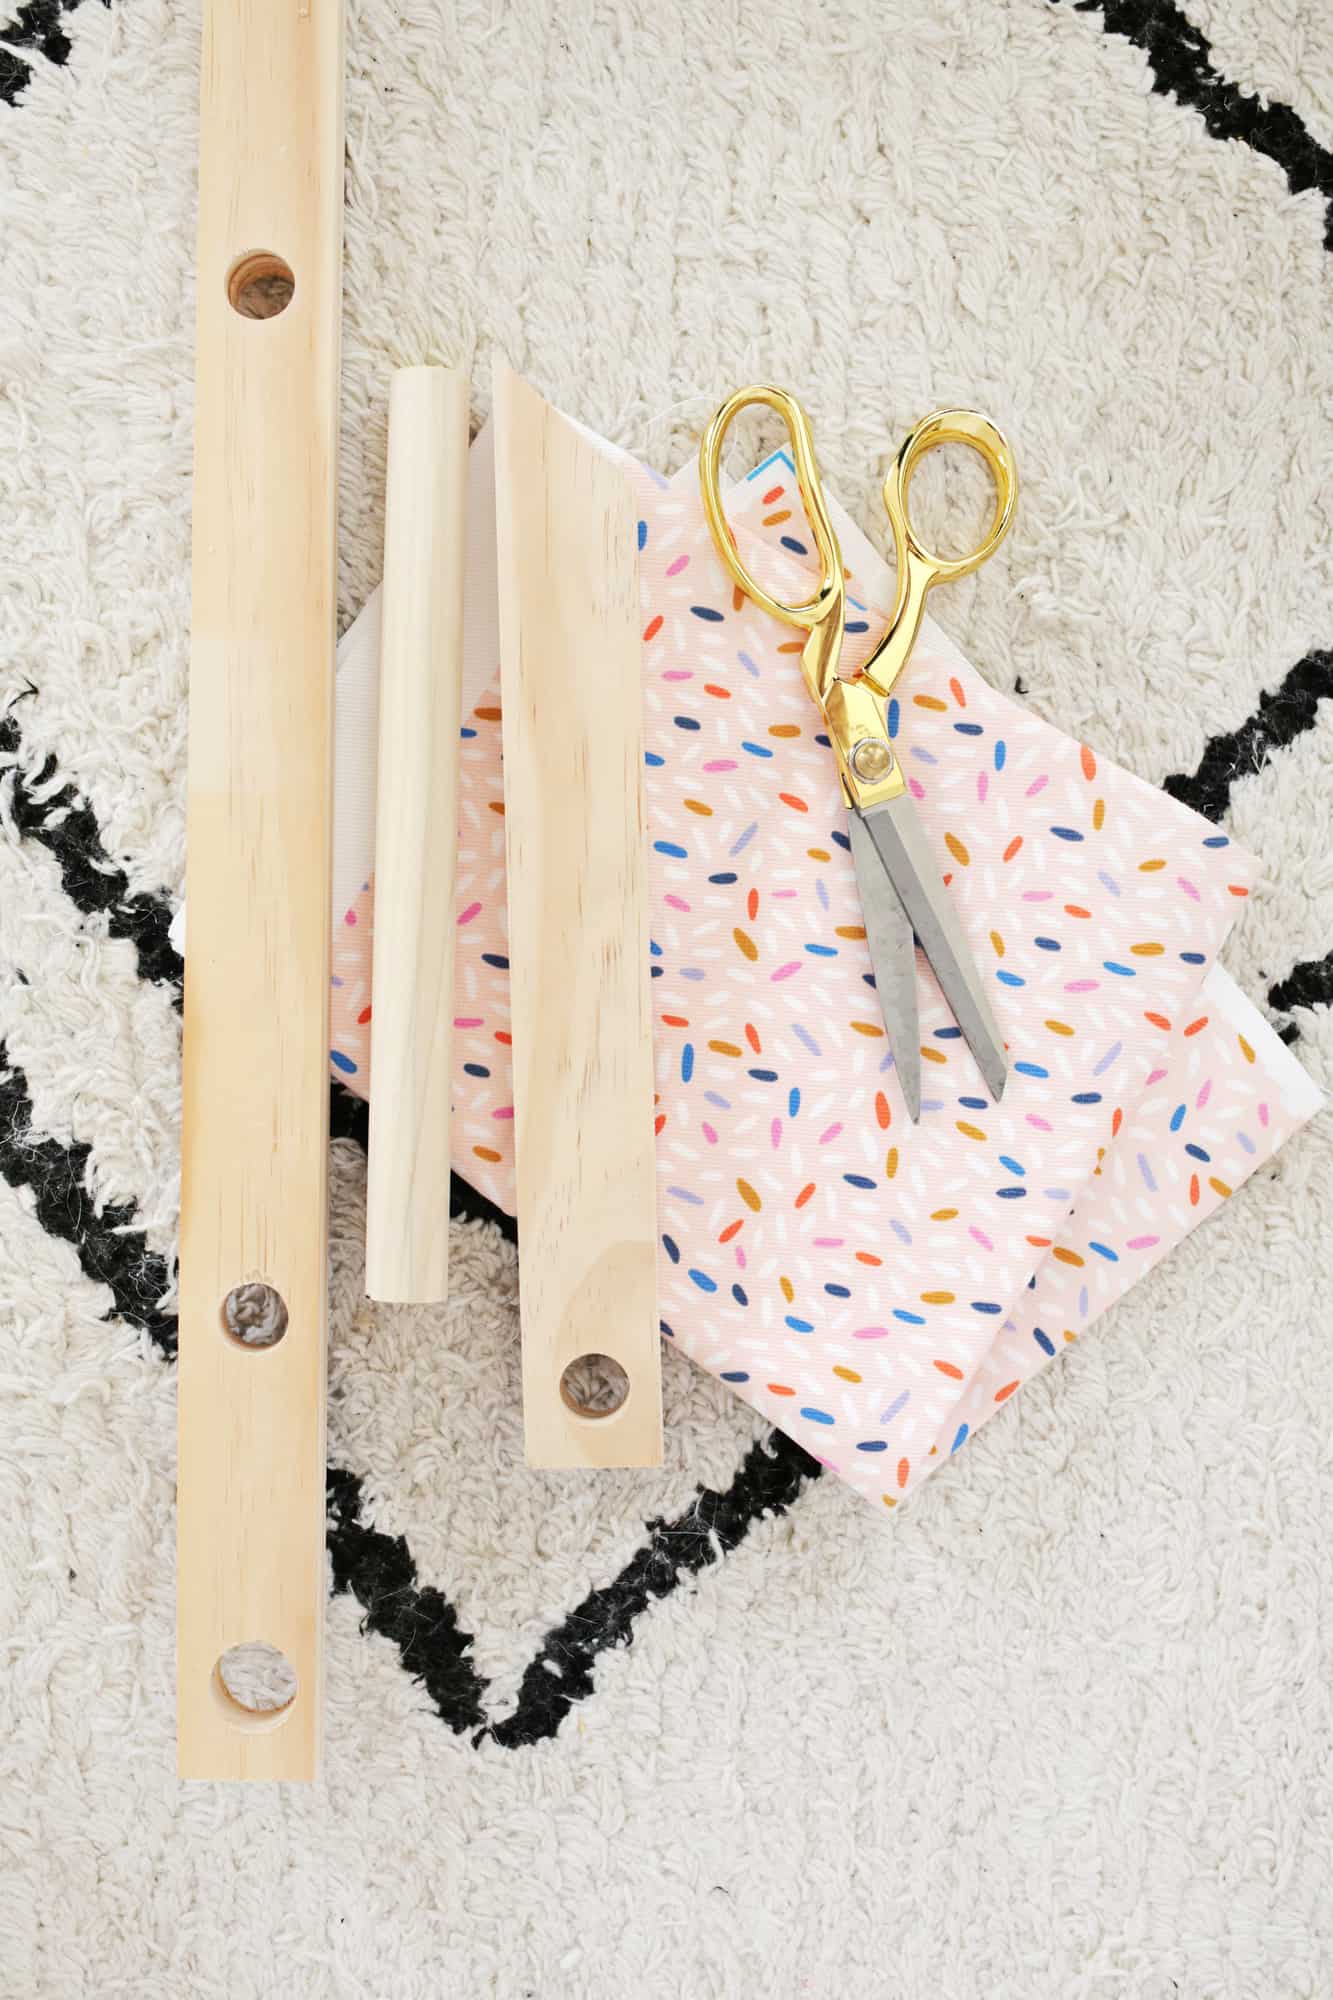 Supplies:
-wooden boards that are 3/4″ thick and 1.5″ wide (see diagram for the lengths of board needed)
-small caster wheel set with 2 that swivel and 2 that are fixed (either these or these)
-paint
-fabric for sling part of stroller and straight pins (I used this print in the canvas option)
-sewing machine
-3/4″ dowel rod (see diagram for the lengths of rod needed)
-drill
-hole saw bits in 3/4″ size (or you can buy a kit with multiple sizes)
-wood glue
–chop saw or jig saw or hand saw
–protractor to find 45° angle if not using a chop saw
–2″ wide wooden circles (you’ll need 4 stacks that are about 3/4″ thick, I used 4 per stack and glued them together)
-glue
-1 1/4″ screws and 1/2″ screws
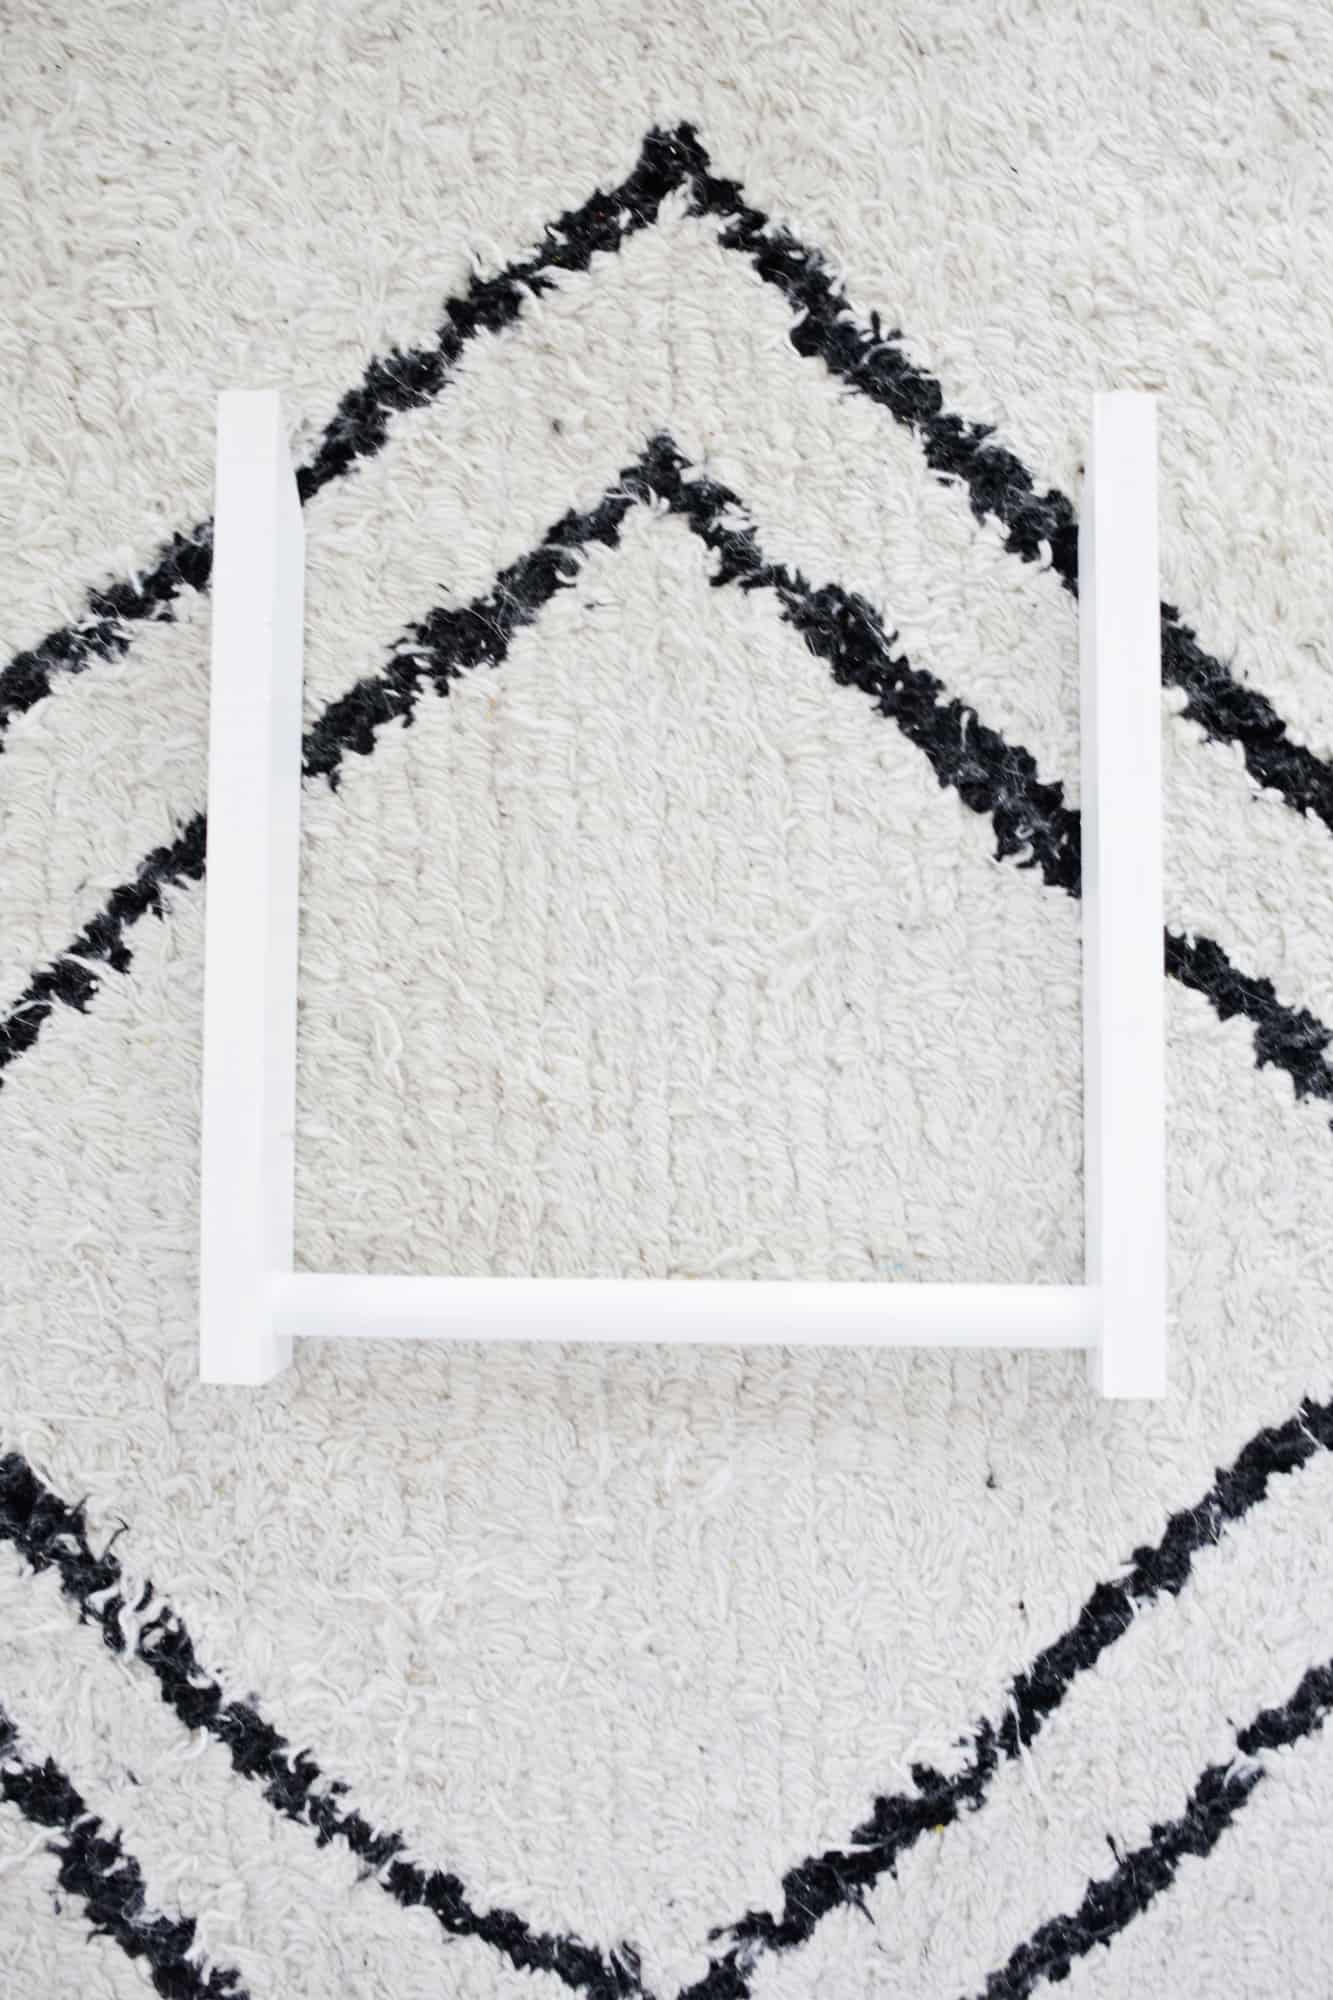
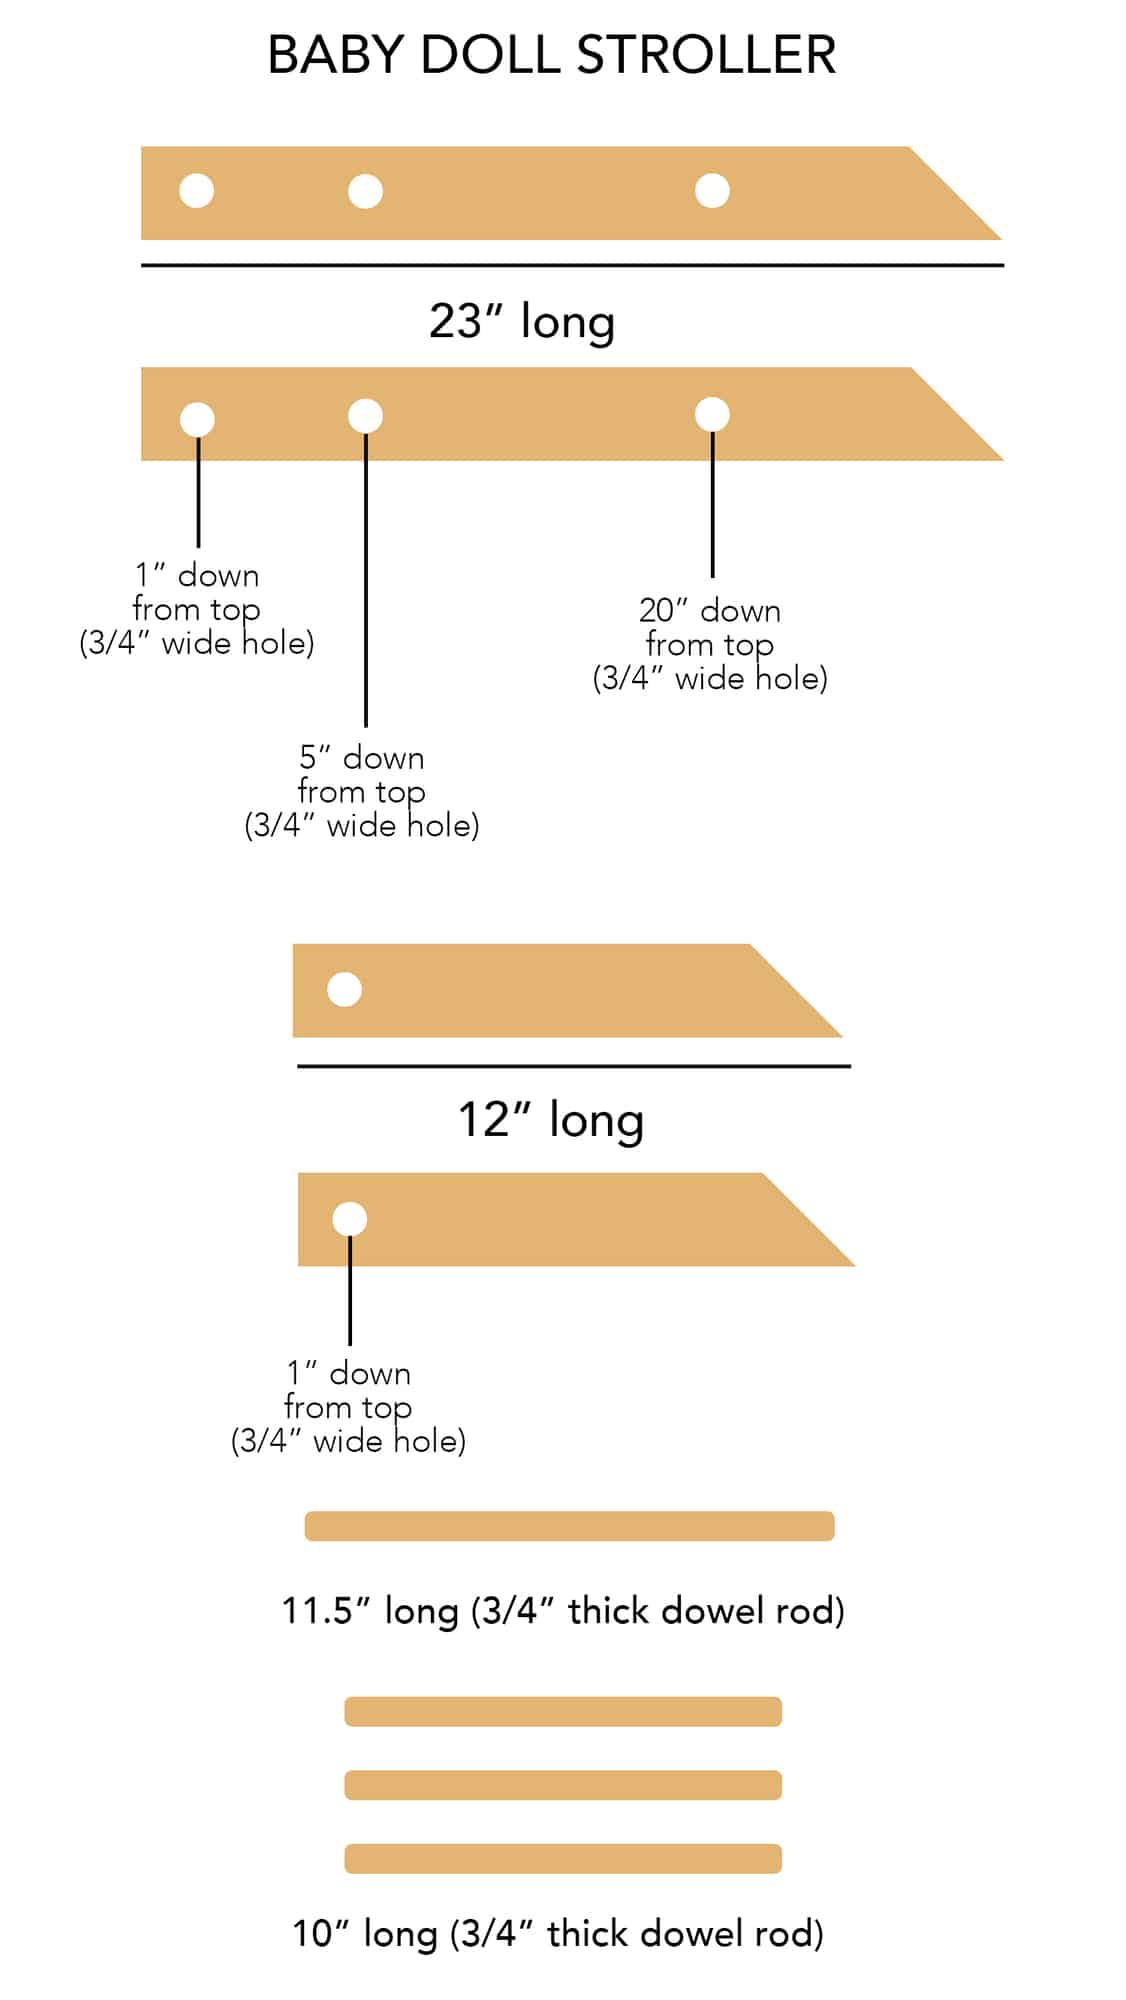 First, you’ll want to cut the 45° angles on your 4 main stroller boards. You can use the guides on your chop saw for this or use a protractor to trace the angle and then use your jig saw or hand saw to follow the line. Then, measure up from the longest part of the angled top to the appropriate length (see the diagram above) and cut a straight line at the top so you have two long boards and two shorter boards that look like the above.
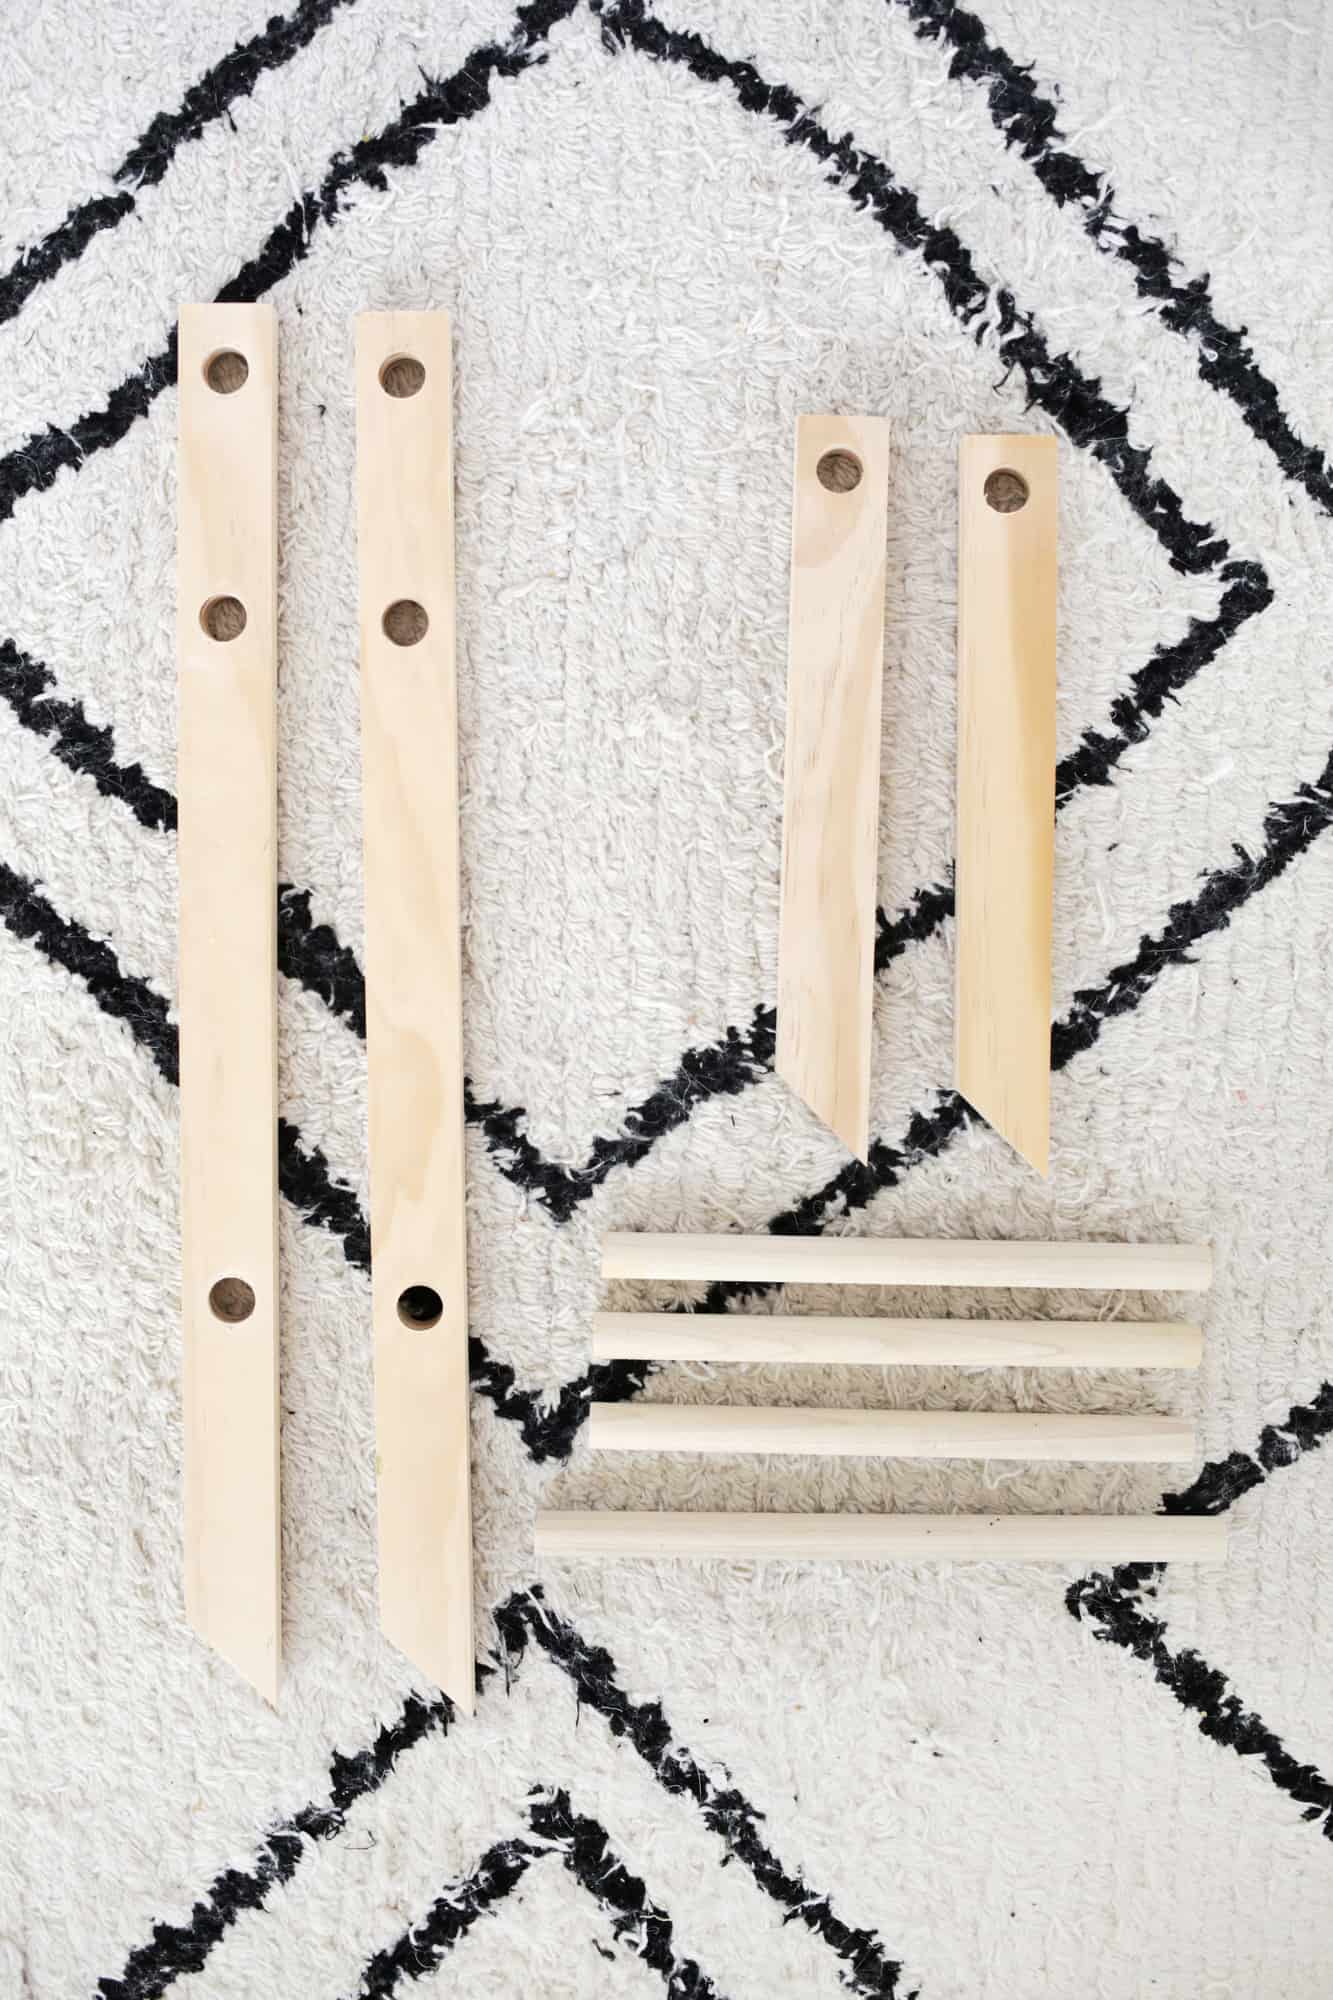 Once you’ve cut your boards and dowel rods, it’s time to drill the holes! Use your drill and hole saw bit to drill 3/4″ holes into the locations specified in the diagram. Try and center the holes as best you can and drill as straight down as possible to avoid the holes from being crooked, and therefore your rods may sit in the frame crooked as well. Once your pieces look like the above photo, it’s time to paint your pieces and move on to the fabric part while they dry!
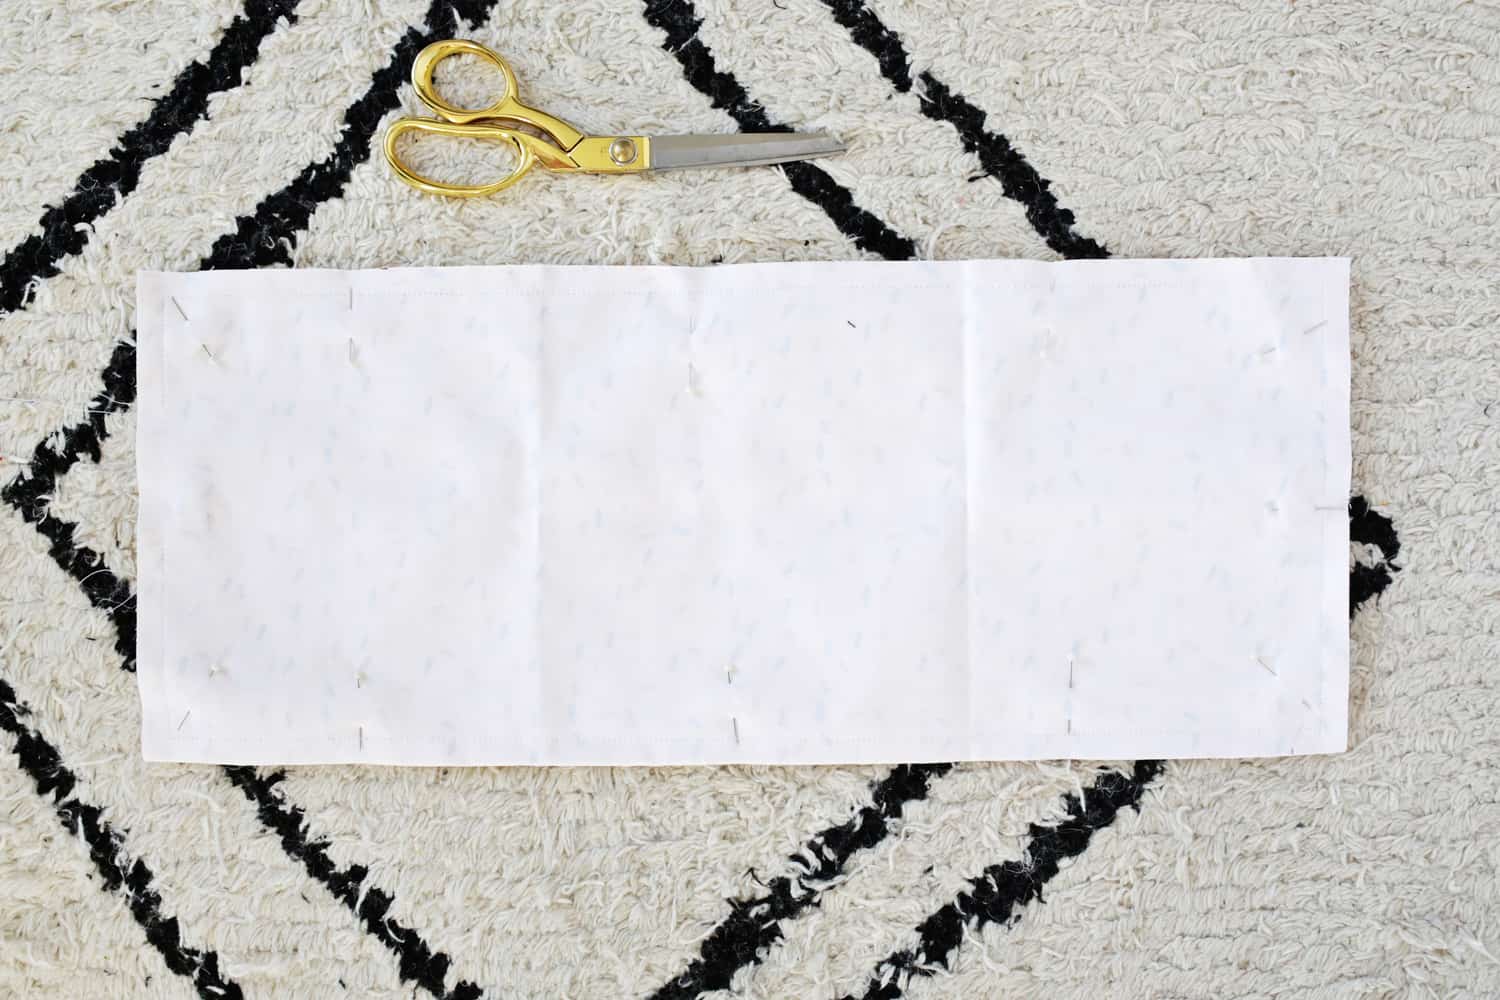 For the fabric part of your stroller you’ll want to fold over your fabric so it’s double thick (with the printed sides facing each other) and cut a rectangle that is 9″ x 23″. Sew all the way around the edge with a 1/2″ seam allowance and leave a 4″ gap so you can turn your fabric right side out.
Turn your fabric right side out through the hole (you can clip the edges off your corners before turning so they aren’t as bulky once they are turned) and press your seams flat.
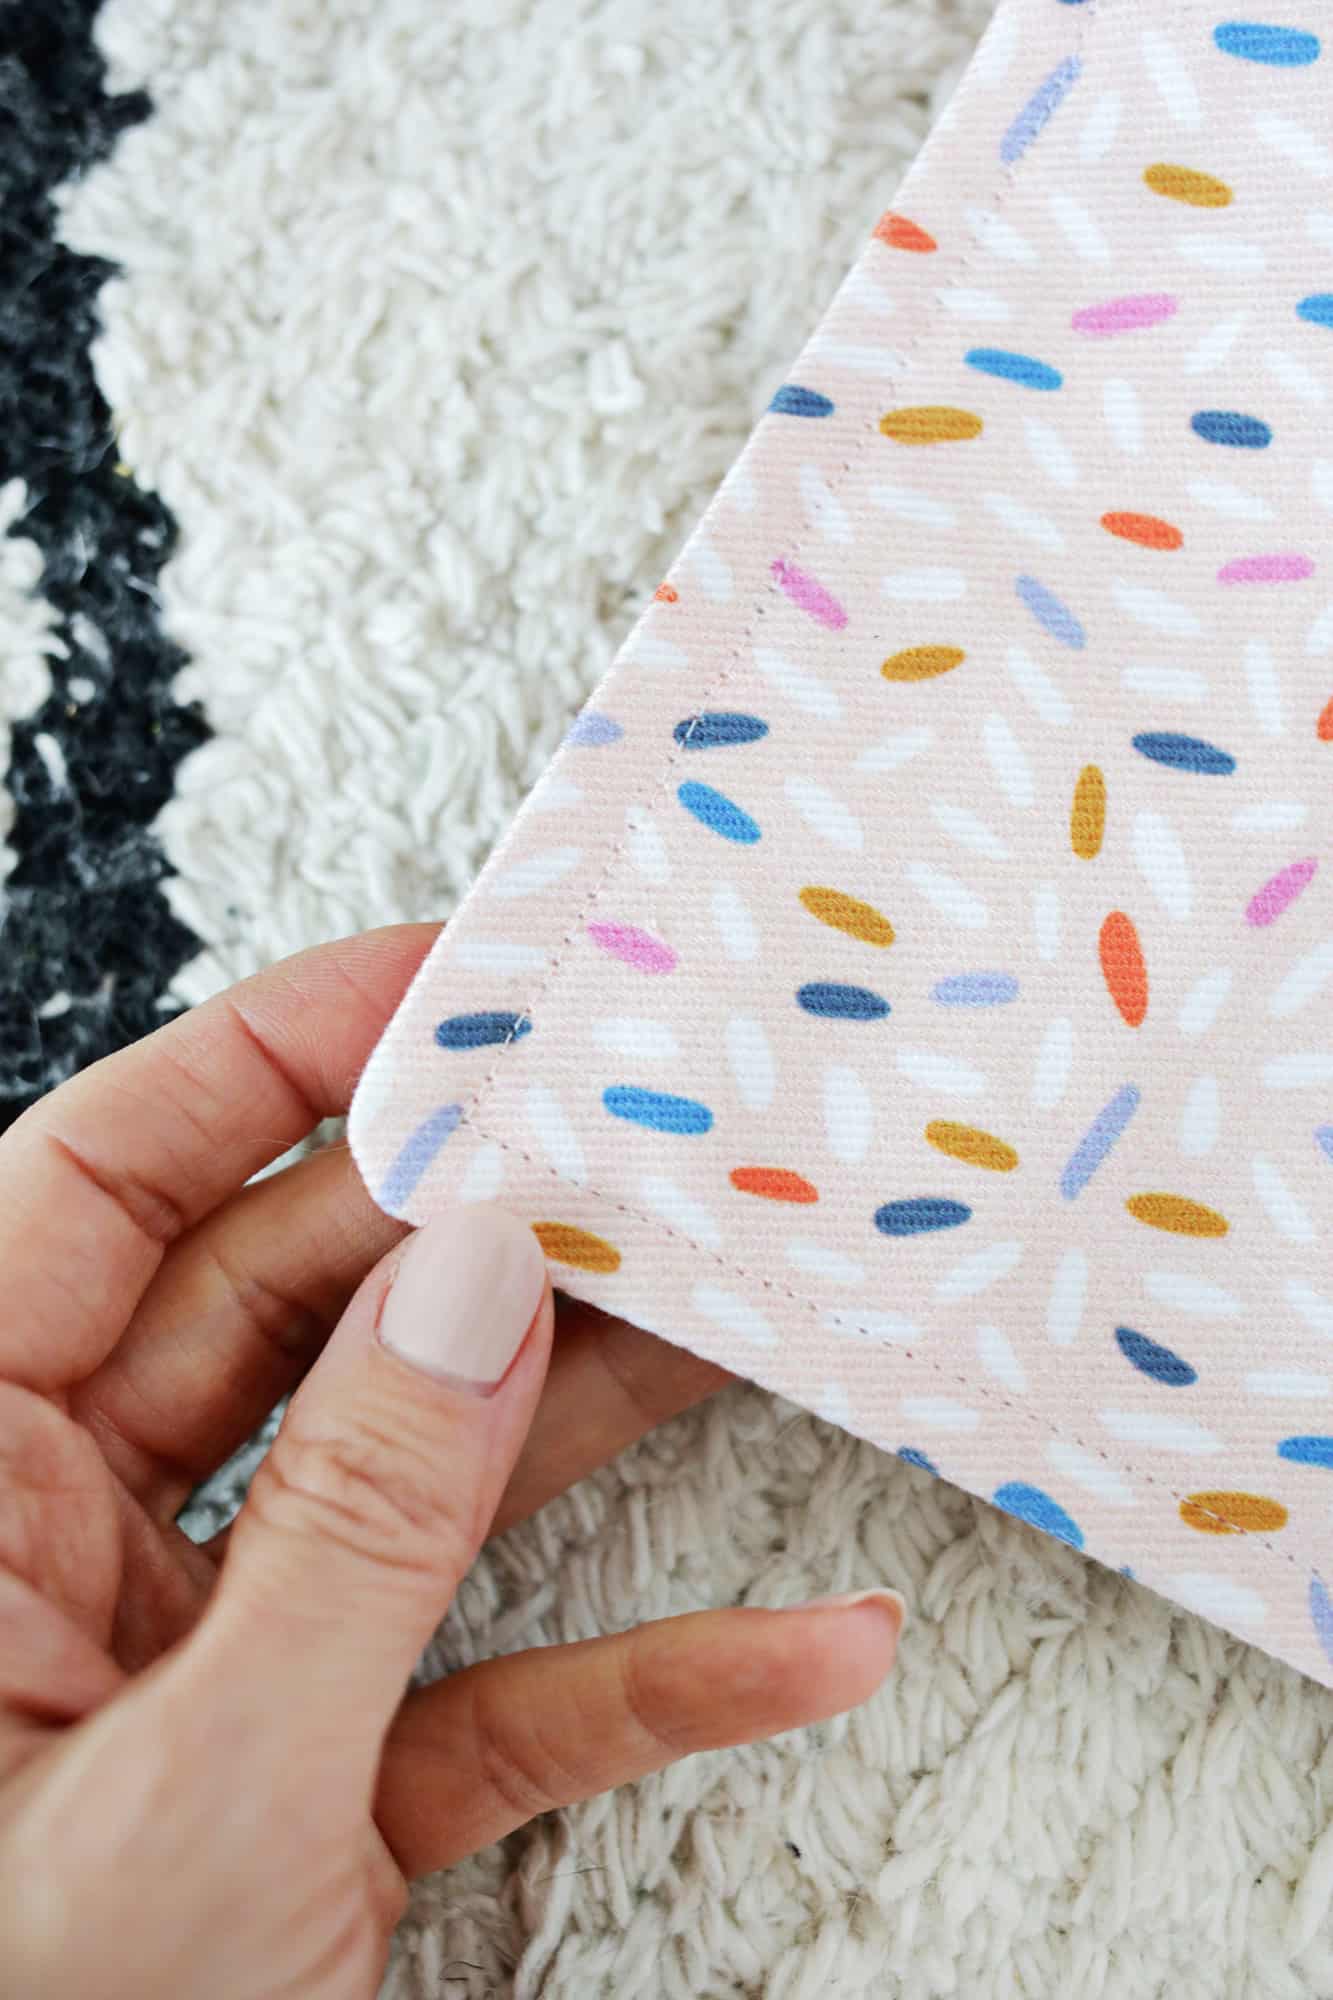 Sew all the way around your fabric rectangle with a 1/4″ seam allowance. This will help your fabric lay flat and will also close up the 4″ gap you turned your fabric through a few steps ago.
Fold the top and bottom edge under and sew a channel opening that’s big enough to get one of your 1/2″ rods through as in the photo above. 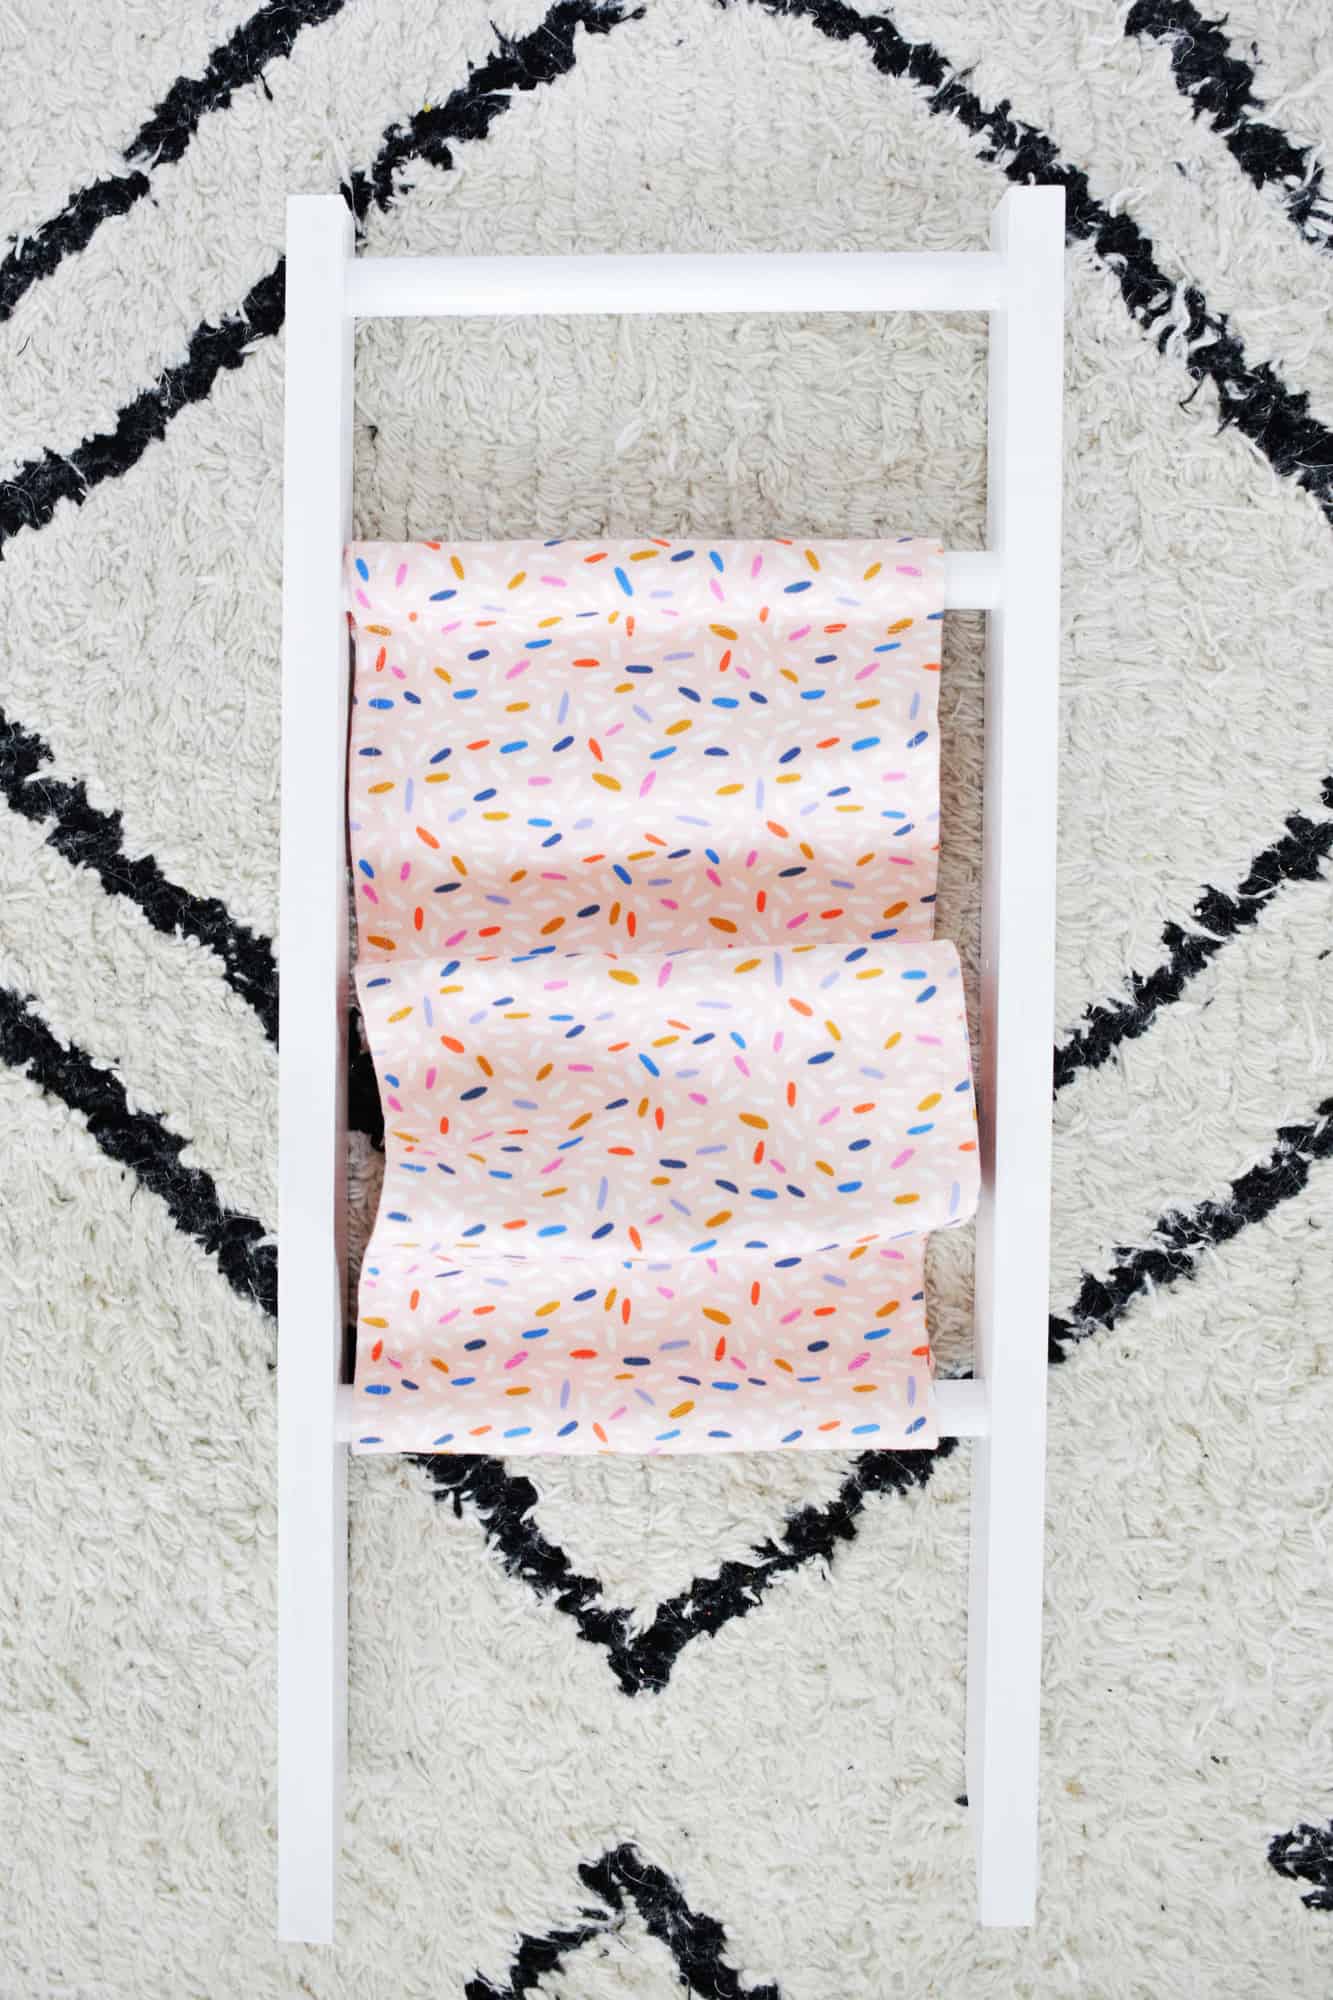
Connect the three 10″ rods into the three holes on the 23″ long boards to create the handle and the inner part of the frame with the fabric already on the bottom and middle rungs. The fit should be pretty tight especially if you painted your wood, so I put a little glue into each hole and then use a hammer to tap each rung into the hole for a snug fit. Try and tap them straight in so your frame doesn’t end up crooked.
For the shorter outer part of the frame, repeat the glueing and tapping process with the 11.5 dowel and the 12″ long sides and give the glue a few minutes to set.
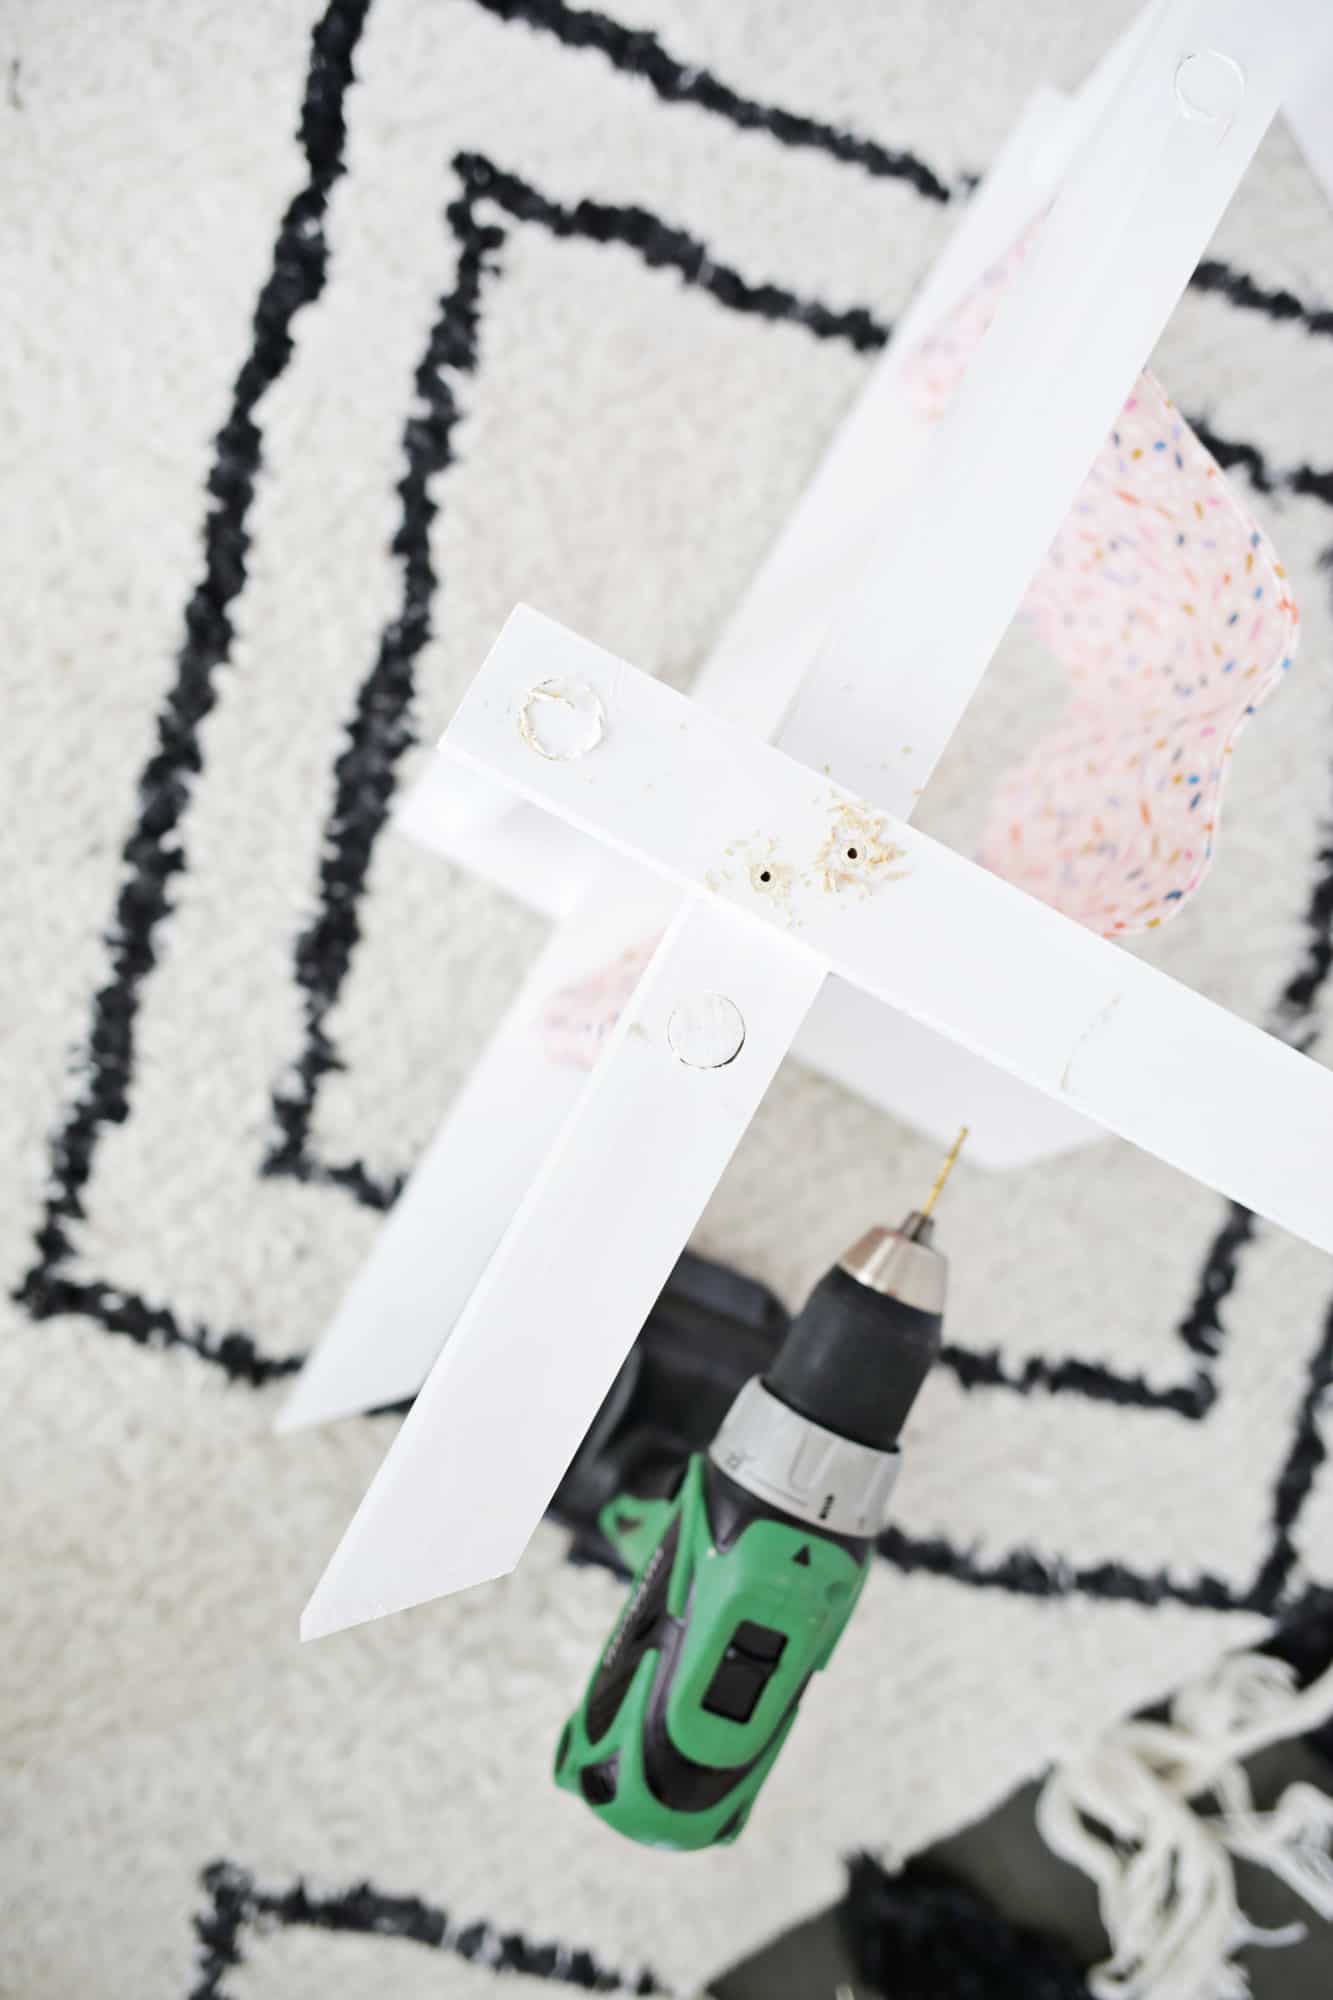
Slide the shorter outer frame over the inner frame a few inches above the inner frame’s bottom rung as above and wiggle it around until both sets of angled feet sit flush with the ground. Once you find that spot, make sure the placement is even on both sides and drill two holes into the cross section where they overlap to attach the frames with 1 1/4″ screws. If you predrill your holes for this (which I would highly suggest), mark your drill bit with tape 1 1/4″ from the bottom of the bit so you don’t go through to the other side. Repeat the process on the other sides so the frame is securely in place.
 Since the swivel caster wheels have a larger hardware base than the wooden frame, I had to add something to the bottom that was wide enough to mount the wheels onto, and tall enough to use a 1/2″ screw to attach the wheels. I ended up stacking and gluing some 2″ wide circle discs to make a 3/4″ tall cylinder, painting them, and attached those to the bottom of each leg with a 1 1/4″ screw. Once they were all on, I could use my 1/2″ screws to attach each wheel to the bases. Remember, swivel wheels go in the front, and fixed wheels go in the back, like a shopping cart. Once the wheels are on, well, you’re ready to play!
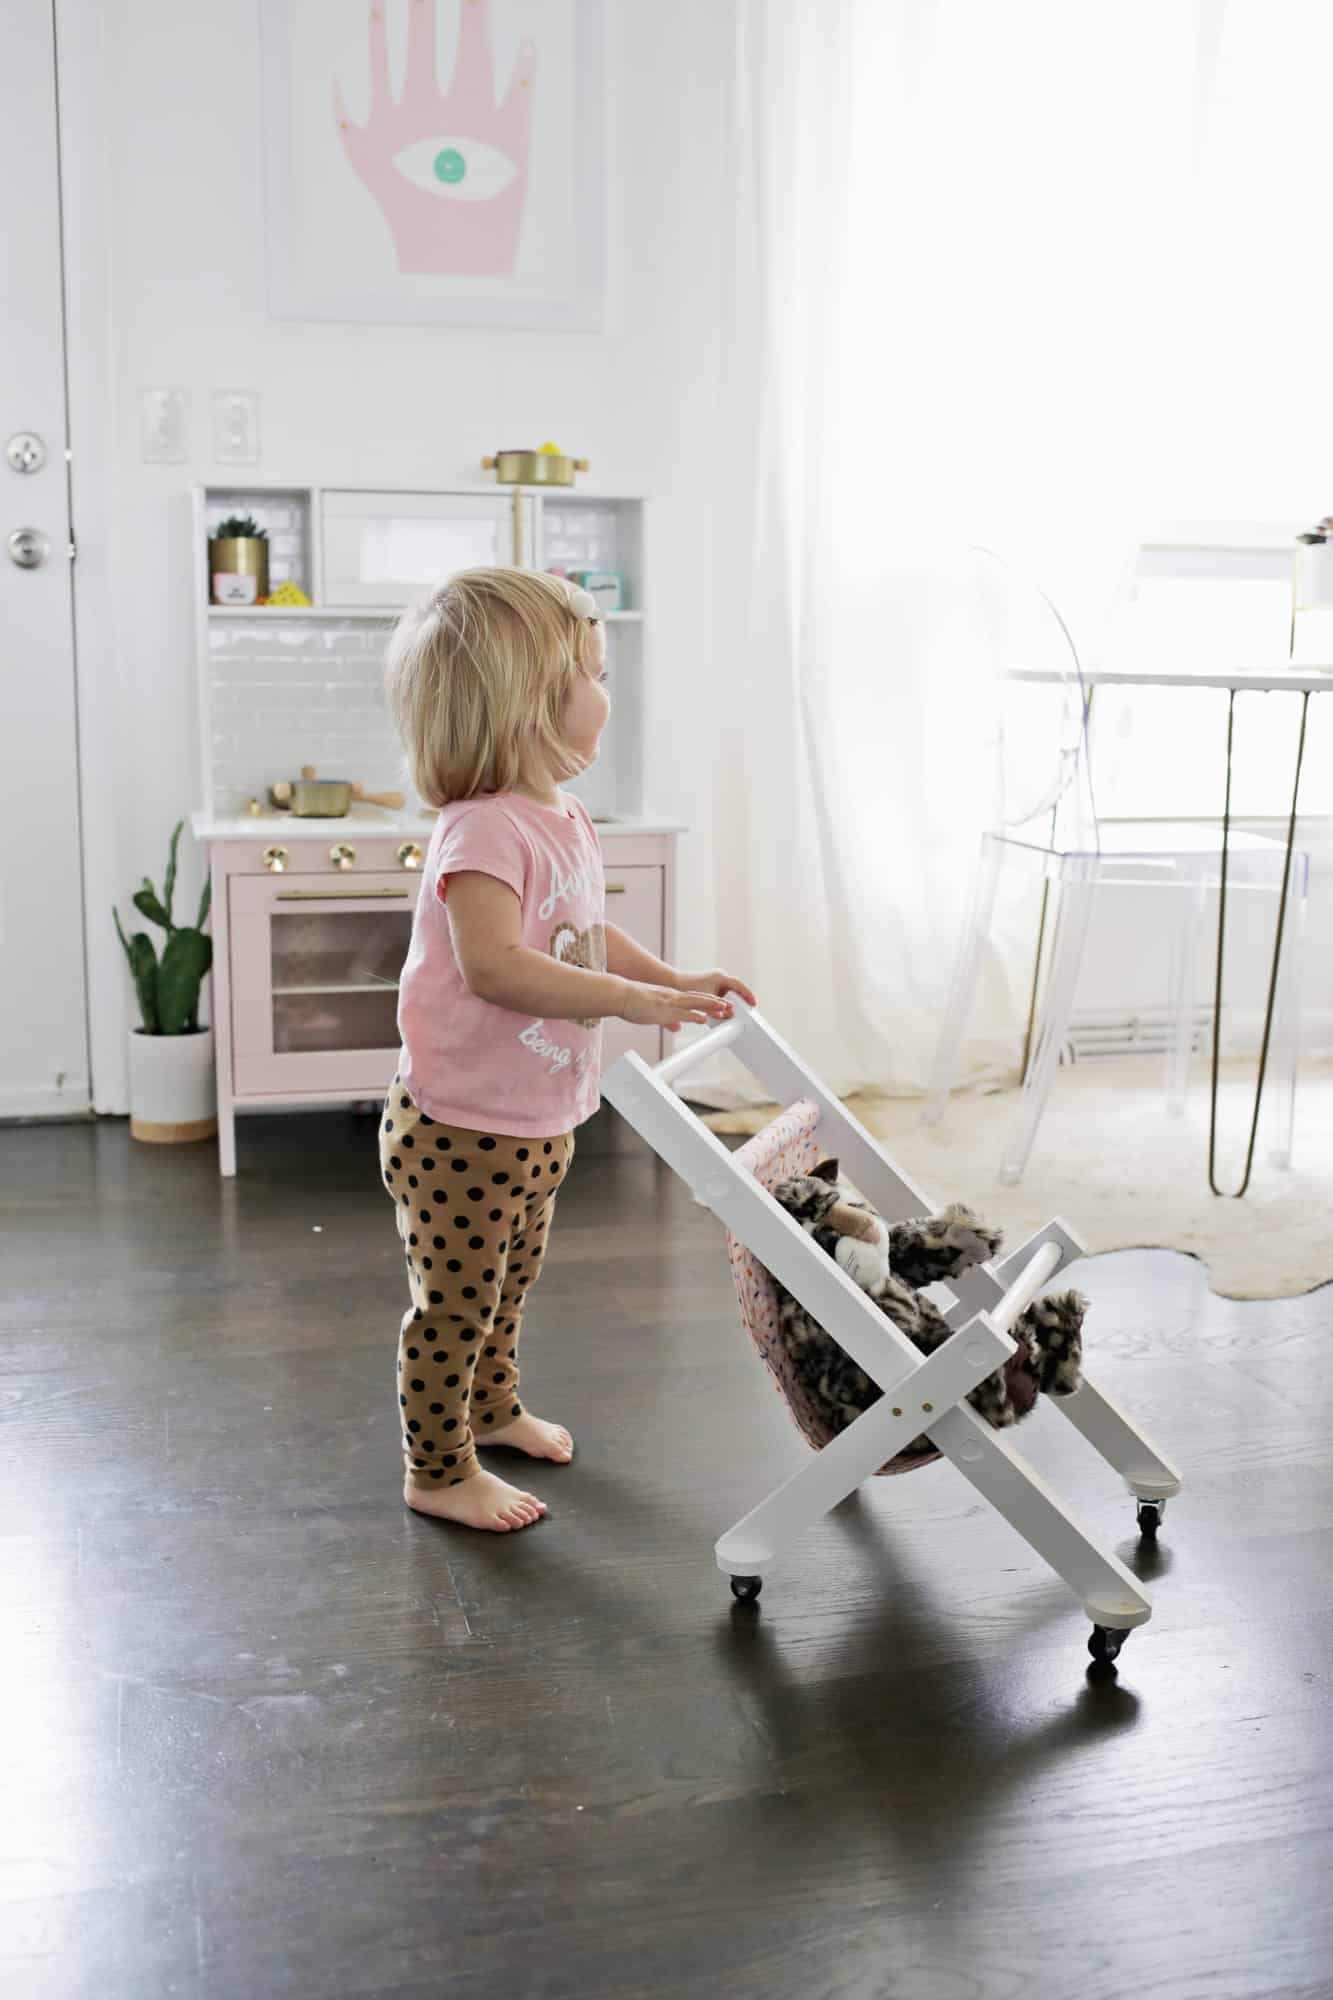
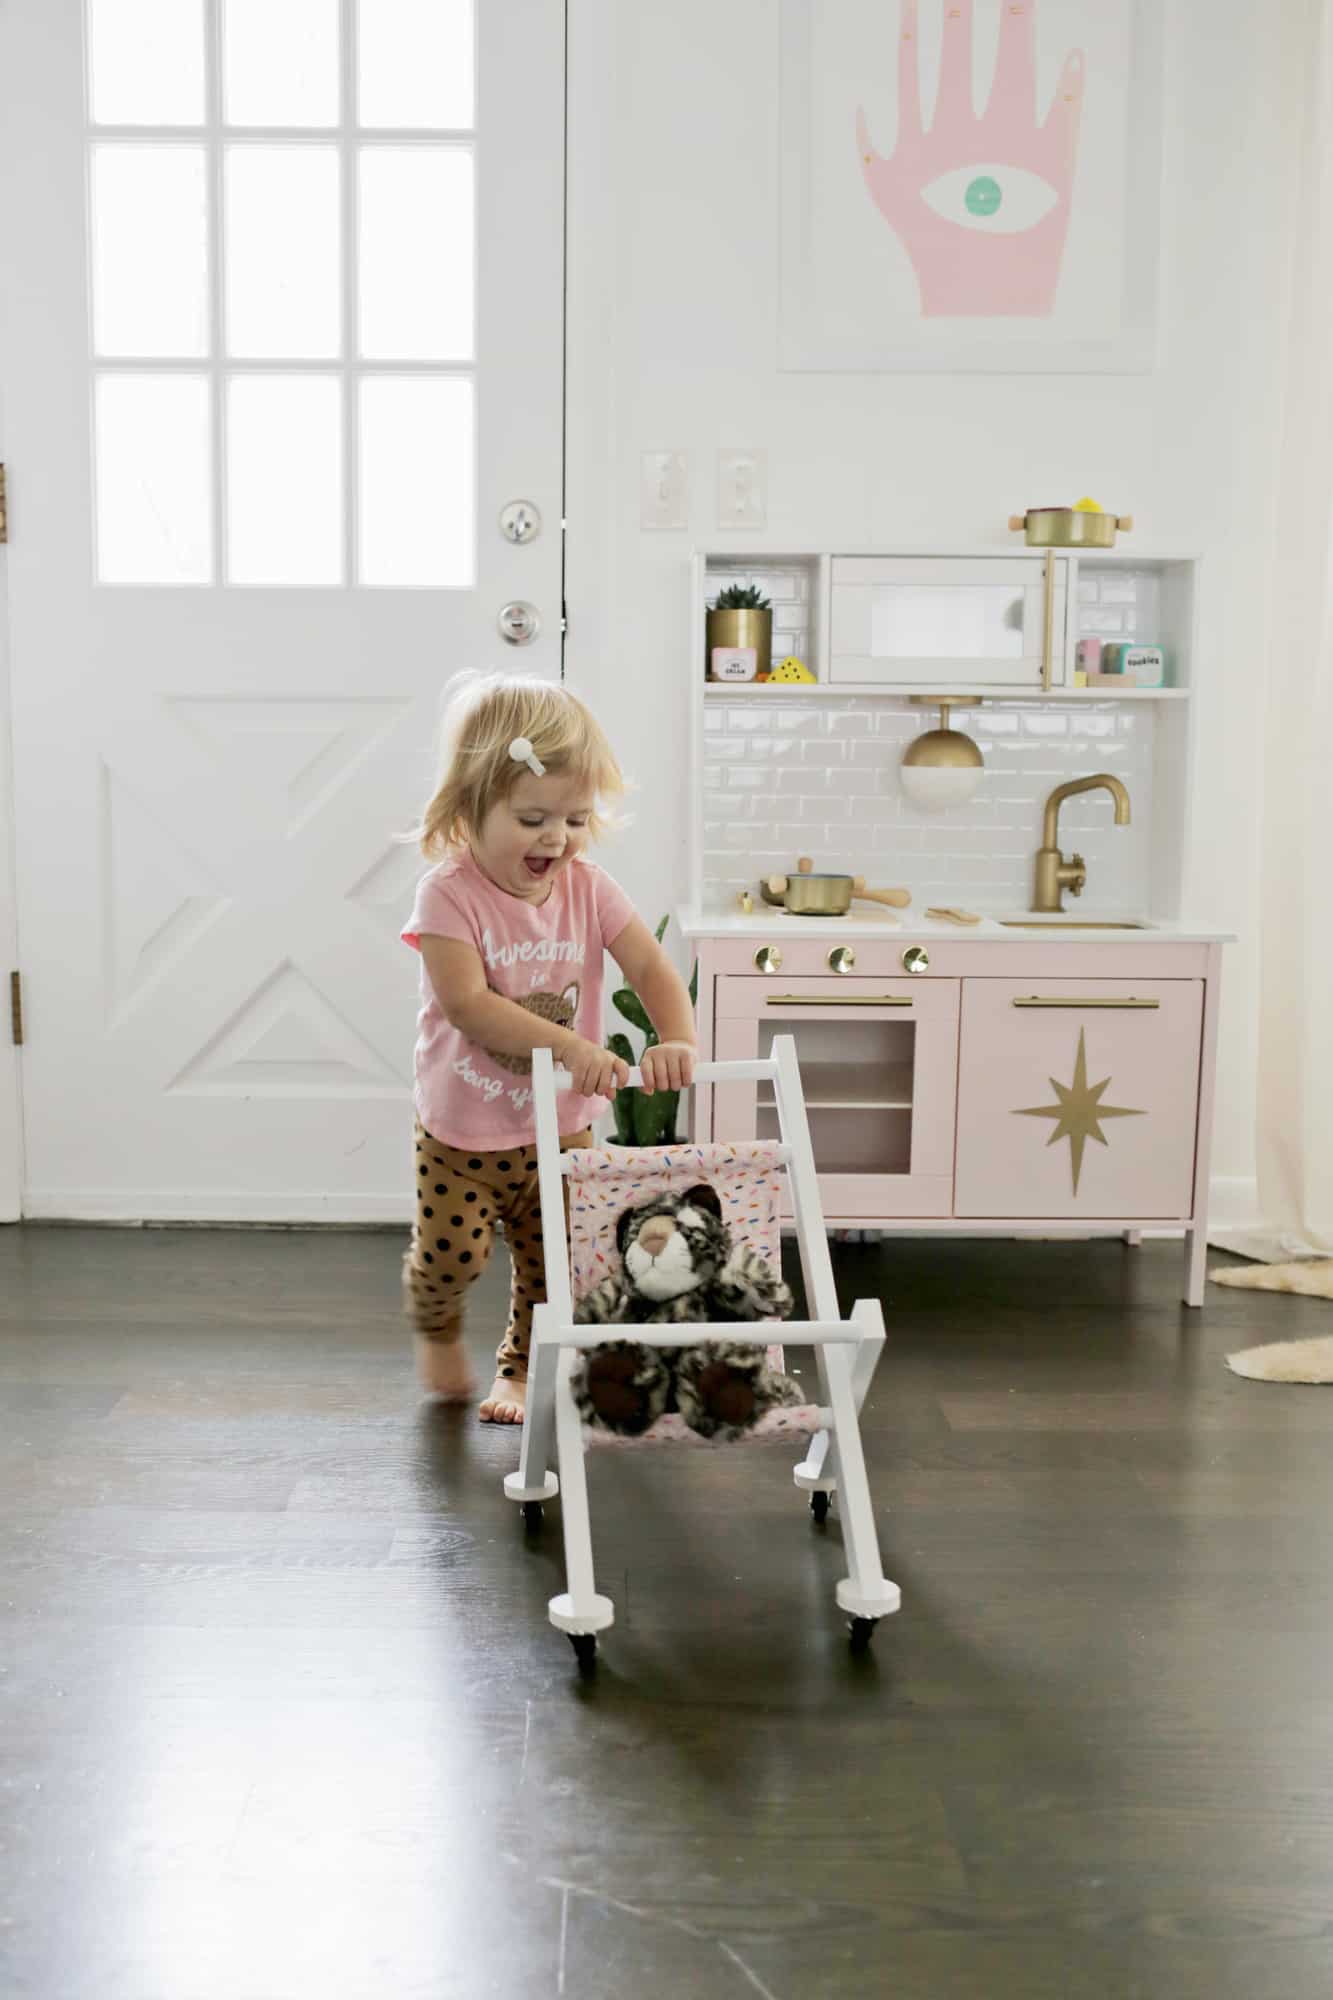 As you can see, well, she loves it! She has up to five different friends that she stuffs into it at one time, and I love that the wheels turn easily for her and it’s light so she can maneuver and even pick it up if she wants to. I’m also glad I chose a canvas-type fabric that has some texture to it and added the front bar so her babies would stay in the stroller better with all the quick toddler driving moves. I get so much delight out of seeing her happy to play with something I made for her. Hope you get a chance to make this for one of your little ones too! xo. Laura

I love this! I made one for my daughter as an Easter present this year. A cool thought for the cloth part is to attach it using snaps so you can wash it, or change it out for a different pattern sometimes. Some of your measurements are wrong for the wooden parts but it wasn’t hard to adjust. (The location of the bottom hole on the long pieces was off) This was a fun easy project! Thank you for this post!
This is SO adorable! Unfortunately I think the diagram is off a bit… it says to drill those bottom holes at 20” from the top, but when I did, it was so close to the bottom of the piece that the piece of fabric will drag the floor. Such a bummer. 🙁
What a lovely creation 🙂 she’s a lucky little girl!
Debs @ https://tiger-mint.com
Look at that smile! What a great way to incorporate toddler play in a really stylish way. Talented Mama indeed!!
So adorable!! Lola & the stroller!
So cute…. and Lola is adorable.
I agree!!
Laura 🙂
So cute!
I was so impressed by the first photo that I read every last word of the instructions, even though my baby is about to learn to drive a real car, not a doll stroller. I wish this blog had been around back when my child was a toddler. Your DIY creations are so superior to what is for sale in stores. Bravo to you for coming up with such a great idea, and bravo to you for explaining so clearly so others can also forgo the plastic schlock and follow your lead.
Aw, thank you!
Laura 🙂
Oh that sweet face! She looks having so much fun. Genius DIY, bravo 🙂
Trust you guys to make the prettiest, most Insta-worthy baby stroller ever! I love the pastel pink colours. Well done! 🙂
Charmaine Ng | Architecture & Lifestyle Blog
http://charmainenyw.com
Laura, this is amazing! I love all the custom items you’ve been designing for Lola. What a sign of absolute adoration for your little girl and the power of your creative prowess.
Gah!!! This is genius and just so adorable!!! Great job!